
Adding a custom image slider to your Rise course is a fantastic way to make your eLearning course pop. More than just elevating your aesthetic, a customized interactable is a great way to grab your audience’s attention (and, also, maybe show off some pictures of your cats). Historically, users have had to build their sliders in Storyline from the ground up before adding them manually. Since this can be both intimidating and time consuming, here’s some good news: there’s a Chrome extension that makes adding an interactive carousel easy (and less cumbersome) for everyone.
Say hello to Mighty. Developed in-house by Maestro, Mighty is a Chrome extension that supercharges the already powerful tools of Articulate Rise and allows for even more customization. Give yourself maximum creativity over your courses: from extended font control like adjusting your text size or line height and custom transitions with no Photoshop or Illustrator required, to a reflection block complete with hint text and PDF download options, to a lightning-fast color picker and, not-so-incidentally, adding a custom image slider.
With a custom image carousel in Rise, you not only have more control and flexibility over image placement and structure but also can create a more interactive and visually engaging course design. Using Mighty’s interactive HTML block, you can make a custom image slider in Rise in just a few easy steps. Best of all, you don’t even need to be a developer to finetune the digital DNA of your course.
In any particular section of your Rise course, you can choose to add an image carousel. You could use a Storyline block, but do you really want to open yet another tool to make one? Why not make things easier for yourself? Let’s walk through it, step by step.
How to make a custom image slider in Articulate Rise
First things first: head over to Google.
Search up custom carousel sliders. One of the tools we like is called CodePen—it’s a site for developers to upload custom HTML, JavaScript, and CSS to show off their work. It’s free, open source, and an absolutely wonderful resource for finding community assets you can use in your courses.
Once you’ve poked around in CodePen and found a responsive slideshow that matches your course’s needs and aesthetics, follow these steps to add it to your course using Mighty.
1) Sign up for a Mighty account
Before anything else, sign up for a free 30-day trial with Mighty. There’s no credit card required and you’ll be on your way in no time.
2) Export and unzip
Export the carousel as a zip file to your preferred location, drag it to your desktop, then select the new file and hit “unzip” from the menu.
3) Compress
Check it out locally. Open up the dist folder, select index.html—check to see how awesome it is—then select the files (including the index.html, ensuring that it is at the root level), and compress them.
4) Back to Rise to swap it out and upload
Move back to Rise. Open up Mighty’s interactive HTML block and upload your custom image carousel located in your dist folder. This will upload your carousel inside of Rise.
5) Clean it up
Remove borders, match to height, make it beautiful. This is also a great opportunity to make any cosmetic adjustments you may want, such as changing the background or font color. If this feels new, easy, and intuitive, it’s because these are just a few of the features available through Mighty.
6) Make it yours
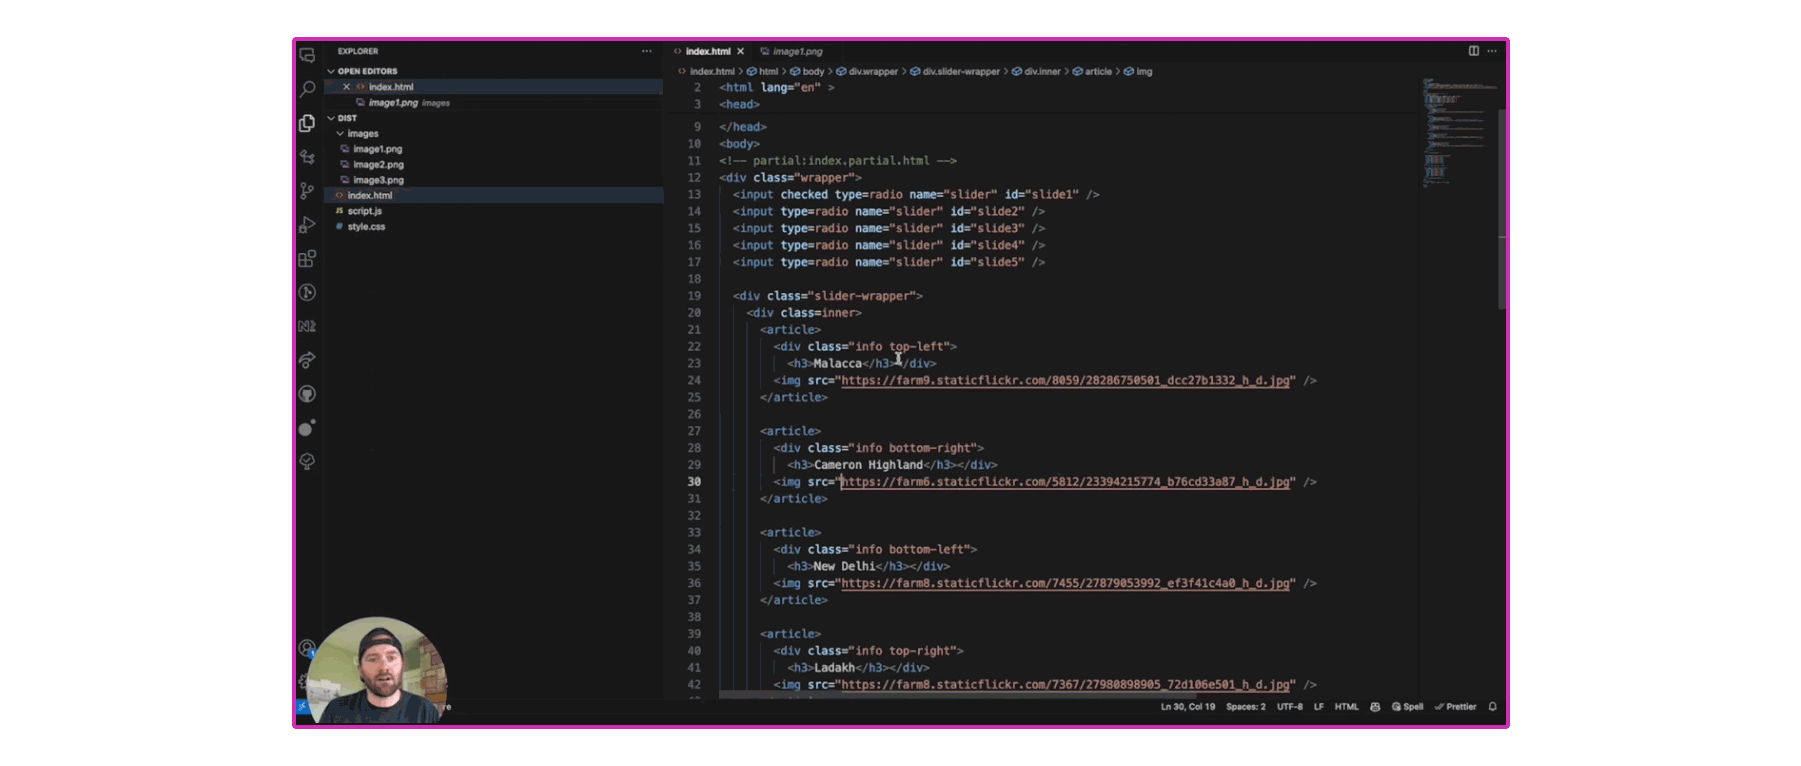
Once your customized carousel is placed where you want it, it’s time to replace the stock photos with your own. Open up the dist folder into a (free) code editor such as VS Code. Once you locate the images within the code, you can swap them out. You may find that the pre-existing images are being remotely hosted—if you already have your images hosted, awesome: just update the image URLs with your own. If, however, your images are local, simply drag and drop your files into VS code.
7) Make an images folder
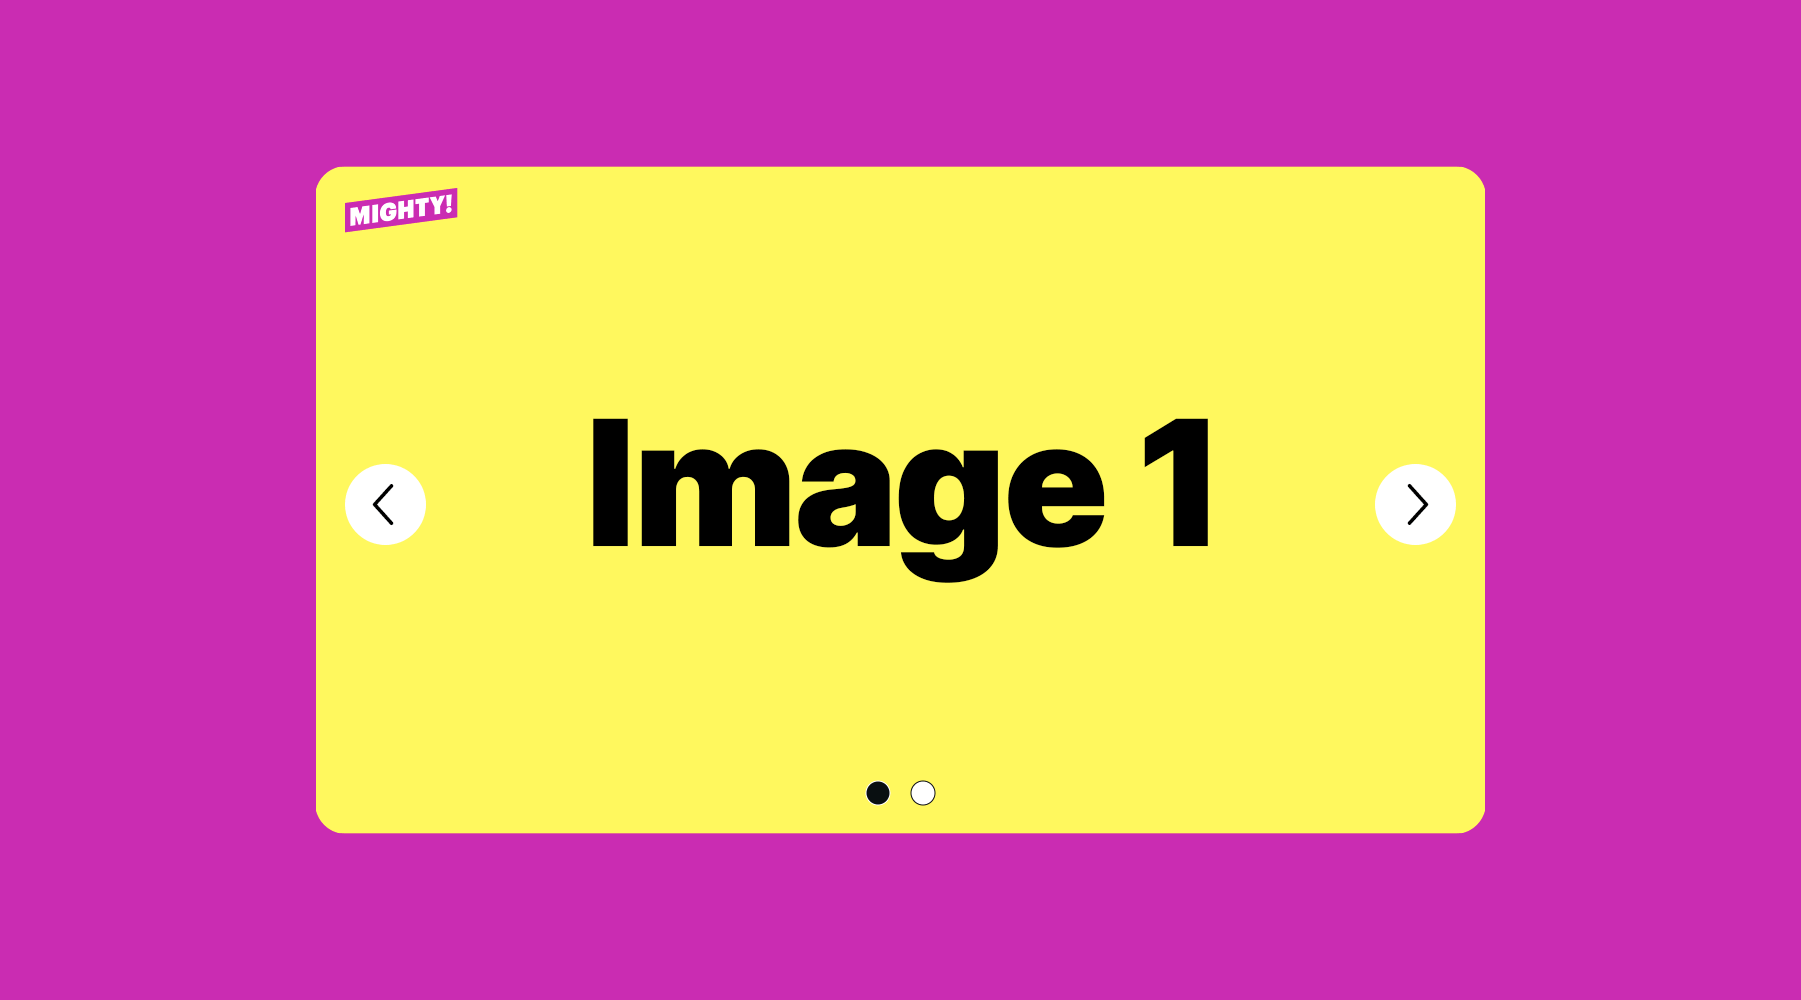
To make things easier, organize your images into a folder and give them each a unique name (even something as simple as Image 1, Image 2, and Image 3). This can help set you up for success down the line if you want to replace them—you’ll only have to swap out the custom slider image files and won’t have to fuss with the HTML.
8) Swap out the images
In the HTML itself, locate the pre-loaded carousel image files in the code, then start swapping in your own files. For example, images/image1.png; for the next image, images/image2.png; and so on. If there are additional spaces for images, don’t worry, just delete the article. You can go ahead and clean up whatever other labels you aren’t using as well. Save it, then move on to the next step.
9) Fine-tune your Rise image carousel
Almost done. Open your slideshow to see how it looks. If you want to fine-tune anything, hop back into the code editor to add text or style the images as you see fit (there’s that new, easy, and intuitive feeling again). If it looks good, then it’s time to re-upload back into Rise using Mighty. Highlight all of your files, right-click, and choose compress.
10) Replace
Go back to your course, open Mighty’s interactive HTML block, and select Replace File. Select your fancy new compressed zip file, let it upload, then voila: you’ve successfully added a new interactive to your Rise course!
Ready to discover what else Mighty can do for you?
Try Mighty for free when you sign up for a 30-day trial!
Get started→