6 Tips for Shooting a Talking Head Video for Your Next Learning Project

Video is a powerful tool for learning. It grabs and keeps learner attention, and it’s a proven medium for boosting retention, too. Plus, learners already engage regularly with video in their daily lives on apps like TikTok and Instagram, and we know that learners prefer experiences that feel intuitive and familiar.

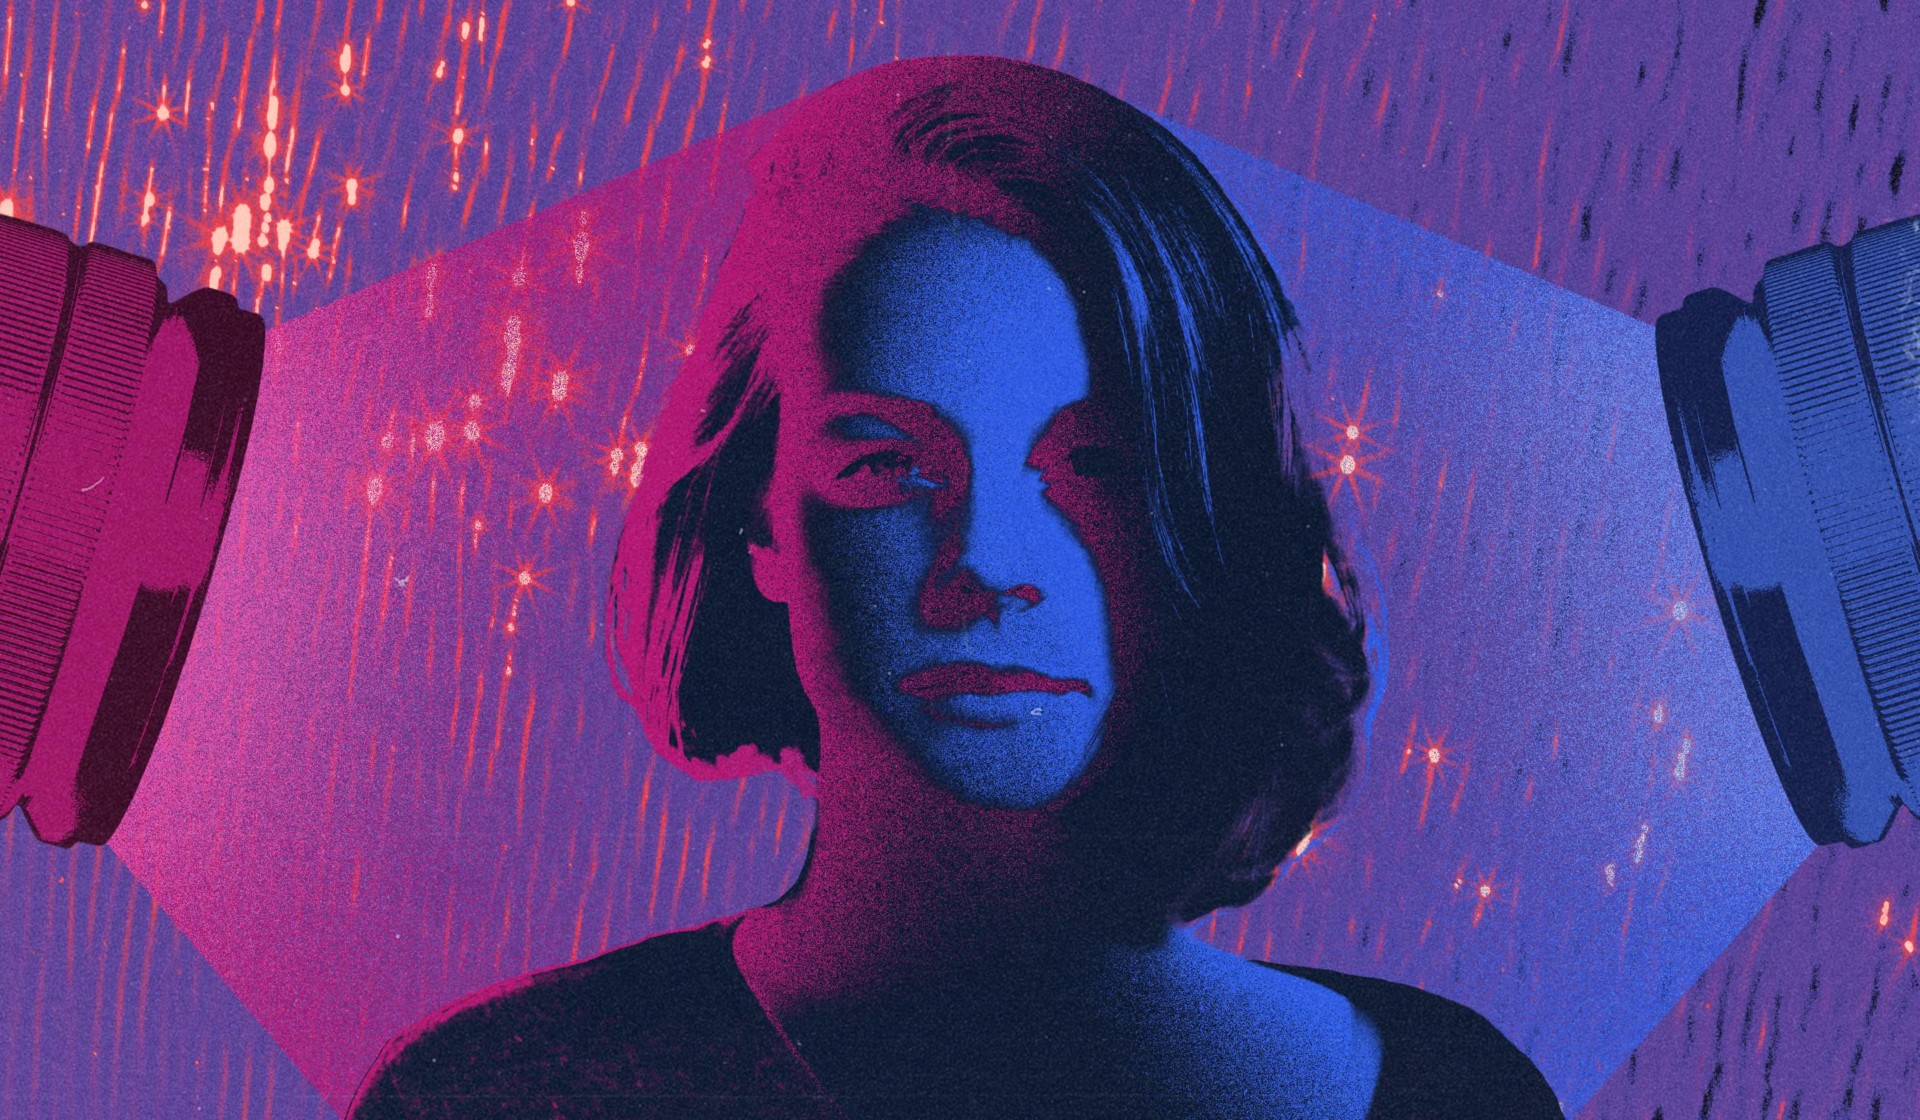
The talking head video has become a particularly popular format for learning projects, and with good reason. A talking head video centers a single person—usually a SME (Subject Matter Expert)—as the main subject, talking directly to the camera. It’s a simple, cost-effective format, and it adds an engaging human element to the learning experience. Especially when you’re looking to influence your audience, talking heads allow you to put a familiar or credible face in front of them in order to add weight to the message you’re delivering.

Although the format is simple, a lot goes into creating a successful talking head video for learning. Our Media team serves as our in-house experts on creating beautiful, engaging, and strategic talking head videos that push the limits of what this format can accomplish. But it all starts with having a solid foundation for your video, and it takes more than sitting in front of a camera to get it right.

Without a solid strategy, talking head videos can run the risk of turning out low quality and distracting—and might even work against your learning goals. But when executed correctly, a talking head video is an engaging and impactful way to add value to the overall learning experience. Here are six tips for talking head video production.

1. Shoot with the end in mind

Before diving into production, take a step back to consider the final delivery and audience for your talking head video. Consider the role it will play in the overall learning experience. Where in the curriculum will it occur? How does the video support the overall goals of the learning project.

It’s always a good idea to pre-plan for the script and make sure your subject is clear, concise, and engaging. The script should also feel cohesive and attuned to the learner journey. For example, can you incorporate callbacks into your script that reference content from earlier in the course? It’s also important to make sure you’re striking the right tone—a video that serves as the opening to the curriculum calls for a different tone than one that wraps up the course.

2. Don’t use green screens

Everyone’s seen the dated, cringe-worthy training videos of years past—don’t be that video. Instead, aim to make your video feel as authentic as possible. Especially for learning projects, relatability is what will hook viewers in and keep their attention. Consider settings that will be familiar to the context of your learners—can you find somewhere quiet that aligns with the subject and goals of your video?

If a realistic setting isn’t in the cards, opt for a clean white background, using a seamless backdrop that you light independently of your subject.

Related

Video Length: 4 Tips That Will Help You Boost Engagement

3. Lighting is critical

Production value matters! All the benefits of using video that we covered earlier are at risk if your video comes off as low-quality or poorly made to learners. Our tips for talking head video lighting: avoid shadows, overexposure, and just plain bad lighting. Learn how to use 3-point lighting. If that’s not available, position your subject facing a nice soft natural light source, like a window. A good guideline: the spot with the most convenient lighting is often the best choice.

Here’s another tip to maximize natural light. If the sun’s shining outside and throwing harsh shadows, try hanging a white blanket over the window to soften the light. If natural lighting just isn’t feasible, try using white lights, not yellow.

4. A little bit of set design goes a long way

Part of the appeal of a talking head video is its simplicity, but it can easily veer into boredom. Learners will be more engaged when your content is visually interesting. Set design is an opportunity to establish the context for the video and reflect the environment of your learners as much as possible.

Are there set details you can incorporate that tie into the learner context? For example, you wouldn’t shoot a training video about manufacturing safety in a boardroom. You don’t necessarily have to go on location to achieve an authentic set design, but even just a few props can set context in the room that supports the subject matter of your video.

5. Audio is 50 percent of the video

Pay attention to this one: bad audio is the most common mistake people make when taking a DIY approach to a talking head video. Don’t count on winging it with audio quality—while there are some mediums where lower audio quality might be acceptable (think social media videos and user-generated content), learning videos aren’t one of them.

Here are a couple of tips for talking head video audio. To achieve high-quality audio, use a boom mic or a lapel mic. The built-in microphone on your camera is only for reference audio.

6. Two cameras are better than one

You want your talking head video to be engaging, right? Videos with more than one angle are more dynamic and interesting, and the best way to achieve that is by using two cameras. Remember to keep your cameras on the same side of your subject, and try alternating between a wide shot and a close-up shot when editing your talking head video.

Think using two cameras might be a bit advanced for you? Here’s a pro tip: having two cameras actually offers a huge advantage for amateurs. You’re not a pro, and that’s okay—using two cameras helps non-professionals cut around any mistakes that may occur, like if your on-screen talent makes a mistake. Another piece of advice if you’re just getting started: shoot at a higher resolution than you need so that you’ll have more flexibility to edit and reframe your shot during the editing process without losing quality.

If you follow these talking head video tips, you’re well on your way to creating a successful talking head video for your next learning project. But it’s also good to know when to hire a professional to guarantee that your video is as impactful and creative as possible. When you get it right, talking head videos can pack a real punch for your learning outcomes, boosting learner engagement and generating real excitement about your subject matter.

How to Use the Learning Ecology Matrix to Make Better Learning

If you’re like us, you’re always on the lookout for new ways to think about and approach learning—even better if it’s backed up by the science of how people learn. When we came across the Learning Ecology Matrix (Wenger & Ferguson 2006), we knew it was a good match for how we design learning experiences at Maestro.

Learning is a process, but too often, we see a one-and-done approach to learning. It’s rare for someone to read a book, take a course, or watch a video and then perfectly apply a new skill or concept on the first try. The Learning Ecology Matrix provides a clear framework for selecting the right learning elements for your learners and thinking through the best way to deliver them. The Learning Ecology Matrix can serve as a guide for designing an effective learning experience that matches the right tool to the job to meet learners’ needs.

It’s all covered in the Learning Ecology Matrix—an under-the-radar tool that can really level up how you’re architecting your learning experiences. Let’s take a look at how it works.

What is the Learning Ecology Matrix?

The Learning Ecology Matrix is a model for blended learning promoted by Dr. Mike Wenger & Chuck Ferguson for Sun Microsystems. The matrix helps learning professionals understand the different elements of a successful blended learning experience and who should be leading it (learner-navigated or instructor-led).

The X-axis indicates the focus of the learning experience. The left end of the X-axis is focused on content delivery, and the right end is focused on instructional experiences to practice what’s been learned. The Y-axis indicates whether the learning element should be learner-led or instructor-led. At the bottom of the Y-axis, learning is instructor-led (teaching and coaching) and at the top, it’s learner-navigated (studying). Each quadrant has examples of different learning events and delivery methods.

It’s a little-known tool, but it provides a great snapshot of how we like to approach learning experiences. Our learning principles are informed in part by the Kolb Learning Model and the four phases of the learning process: discovery, planning, application, and reflection. These phases map well onto the Learning Ecology Matrix, especially the discovery and application phases. You can use the Learning Ecology Matrix to architect a learner-centered, strategic experience that meets their needs throughout the learning process.

How to Use the Learning Ecology Matrix

As with any theory, the Learning Ecology Matrix is not meant to be prescriptive. Instead, it’s another tool in your toolkit to back up your learning decisions and create the best learning experiences possible.

The Learning Ecology Matrix can help you think through what your learners need at different stages of the learning process and help push you to think beyond the status quo. Instead of defaulting to delivery methods you’ve used time and again, use the matrix to ask yourself questions about what approach would actually serve your learner audience best.

Is this learning event focused on content delivery or application? Should it be guided or self-navigated? Are you pairing content delivery (left end of the X-axis) with a meaningful application activity (right end of the X-axis) so that learners can practice what they’ve learned? From there, you can holistically look at the context and backgrounds of the learner audience in order to customize a thoughtful, nuanced learning experience.

Let’s take a closer look at the four quadrants that make up the Learning Ecology Matrix.

Guided content delivery

The bottom left quadrant focuses on guided content delivery, or teaching. This quadrant represents the discovery phase of the learning process when an instructor is teaching learners something new. This kind of learning calls for demonstrations, video-based lectures (vILT), classroom lectures, eLearning courses, and learning videos.

Notice that as you move up this list towards the self-guided content quadrant, the activities become more independent—but because they’re still designed by an instructor, they’re considered a guided content experience.

Self-navigated content delivery

The upper left quadrant is all about self-navigated content delivery, or studying. Here, learners are discovering new information independently and these activities don’t need to be led or designed by an instructor. This quadrant also covers just-in-time learning that learners access at the point of need. This kind of learning is critical to the learning process—it allows learners to find the support, answers, and guidance they need when it’s most relevant. Job aids, glossaries, FAQs, guides, reference materials, books, articles, and podcasts are great resources to make available to learners for self-navigated content delivery. The materials that students study here aren’t necessarily designed to be instructional, and students can determine their own pace and learning path.

Pro tip: the discovery phase (the left end of the Learning Ecology Matrix) is where L&D efforts often get derailed. It’s easy to get singularly focused on this phase instead of considering it a starting point in the learning process. Whenever you’re using a learning element from the left end of the matrix (content delivery), pair it with at least one of the practice activities on the right end of the matrix so that learners can build their skills, not just their knowledge.

Self-navigated practice

Let’s turn our attention to the right end of the matrix, which focuses on building experience and practice. In the upper right quadrant, learners participate in self-navigated practice, or projects. These activities are meant to build skills, not just deliver information.

Learners drive their own engagement in practice activities that closely resemble scenarios they’ll encounter in the real world. Here, students learn from activities like peer discussions, case studies, role play, simulations, scenarios, and games. These kinds of activities allow learners to delve deeper into skills they found challenging and keep putting it to the test until they’ve mastered it.

Guided practice

The lower right quadrant gets learners engaging in guided practice, or exercises. Learners practice and apply their skills through instructor-led exercises like tutoring and coaching, experiments, practice labs, and augmented and virtual reality learning experiences.

The right end of the Learning Ecology Matrix engages learners in the application phase of the learning process, pushing them to make use of what they’ve learned. Getting learners to try their hand at what they’ve learned helps them to accurately assess their abilities, identify any knowledge blind spots, and keep practicing until they can apply the skill successfully.

The two sides of the matrix complement one another—an effective learning experience requires a blend of learning elements from all four quadrants.

Learning should be built with empathy

Learning should meet people where they are. Tools like the Learning Ecology Matrix help inspire creative, strategic thinking that pushes us beyond the status quo. Rather than making one-size-fits-all assumptions, we believe in thinking deeply about what learners truly need to learn—and how they need to learn it—in order to gain knowledge, build their skills, and grow.

How to Best Leverage Synchronous vs. Asynchronous Learning

Over the last two years, so much about the way that we learn has been turned upside down. Traditional, in-person classroom training went virtual, and scheduling a live session became more complicated than ever. The upside is that it prompted many to reconsider their learning strategy and how to best leverage synchronous vs asynchronous learning. 

We’ve delved into the differences between synchronous learning vs asynchronous learning before and thought through the pros and cons of each. Here’s the quick recap: synchronous learning happens when people are learning the same thing at the same time—think traditional classrooms with a teacher or facilitator, live virtual sessions held via video call, and other forms of learning where the teacher and learners are on the same schedule and knowledge transfer happens in real-time. 

Asynchronous learning happens when people are learning the same things but at different times. That’s key to understanding asynchronous learning vs. synchronous learning: asynchronous learning does not require that learners show up, log in, or participate at a specific time. There aren’t virtual lectures or scheduled class periods that the learners must attend—instead, learners access materials independently and at their own pace.

So, what is synchronous and asynchronous learning? When should you opt for synchronous learning and when is it best to take an asynchronous approach? And how can the two work together to create an effective blended learning experience? 

How to best leverage synchronous learning

Synchronous learning is a classic for a reason: there are plenty of instances where live, real-time learning can’t be beat. There’s often a benefit to being together with learners at the same time. It’s a matter of asking yourself the right questions to determine if synchronous learning is the best fit for your material—and how to make the most of your time together when you do opt for a real-time experience. 

What is synchronous learning right for? Here are some questions to gut-check if synchronous learning is necessary, and if you’re prepared to deliver the best experience possible (especially if it’s a virtual session!):

  1. Why does everyone need to be together at the same time? 
  2. Since we’re all together, how might we interact as much as possible? 
  3. As much as being a teacher is important, how can I serve as an effective host?
  4. Am I prepared for potential logistics problems? 

Once you’ve done the legwork to ensure you’re ready to deliver a quality synchronous learning experience, here’s a quick rundown of the kind of learning material that is well-suited to synchronous learning.

Active learning

Active learning calls for learners to directly interact with the learning process—think experiential learning like group discussions, demonstrations, and hands-on activities. These traditional classroom activities are a natural fit for synchronous learning, but they don’t necessarily require in-person learning. Virtual classrooms can leverage tools like breakout rooms and digital whiteboards to facilitate meaningful active learning that gets learners interacting with and learning from one another.

Is this active learning?

Not sure if your learning material is active or passive? Here’s a quick tip to differentiate one from the other: consider the ratio of how much your learners are producing versus consuming. Say your lesson plan involves students working together to produce and share a presentation, or participating in a demonstration of a new procedure. In both cases, it’s the right call to get together as a group in real-time.

Teaching concepts

If your learning experience involves the kind of active learning exercises mentioned above, there’s a good chance you’re teaching a concept. Concepts are ideas that need to be understood, not memorized. Collaboration and engagement are valuable tools to facilitate learning a new concept, and it’s a great reason to bring a group together for synchronous learning. Synchronous vs asynchronous learning also allows learners to participate in real-time Q&A and receive instant feedback from teachers, which can accelerate their understanding and improve learning outcomes.

Practicing procedures

Need to teach your learners a new procedure or protocol? Usually, that means it’s time to bring the group together. It takes practice and repetition to perfect a procedure—a synchronous session is a great opportunity to hold a live demonstration and follow it up with some active learning exercises to encourage application and reflection. Send your learners into small groups or pairs to replicate the demonstration and practice executing it themselves. This also encourages more informal peer-to-peer learning and knowledge sharing.

Common pitfalls with synchronous learning

Just because you can host a real-time learning session doesn’t mean you should. Synchronous learning is often the default, but it’s worth it to take a step back and consider the pros and cons of synchronous vs asynchronous learning. Ask yourself if the material truly requires everyone to be together as a group, and revisit the reflective questions we shared earlier to help clarify if synchronous learning is the right fit.

Once planning for your synchronous session is underway, be sure to avoid the “talking head” syndrome that plagues many traditional classroom settings. Especially if you’re attempting to recreate an in-person classroom virtually, many make the mistake of commanding all of the time to rattle off slides and information-dump. Instead, be sure to plan for interaction, brush up on your hosting and moderating skills, and, of course, find a quiet place with a solid internet connection for hosting your session.

How to best leverage asynchronous learning

We’ve all attended a meeting that could’ve been an email—and every learner has attended a training about something they could’ve learned on their own. Asynchronous time is individual time, and we see it used effectively in virtually every discipline. College students complete readings and write papers outside of the classroom. Musicians practice scales on their own. Athletes independently study film of their opponents. 

Asynchronous learning allows learners to complete assigned tasks on their own time and at their own pace. This approach saves time (and often money) and protects the individual’s autonomy to learn in a way that works best for them. So, when considering synchronous vs asynchronous learning, when is asynchronous the best choice? What is asynchronous learning right for? And what are some best practices for effectively leveraging this style of learning?

Learning facts

Let’s return to the content ratio concept we talked about earlier in the “Is this active learning?” section—it’ll help clarify whether to choose synchronous learning vs asynchronous learning. If your learning material requires listening to presentations, watching videos,  and reviewing slide decks, then your lesson plan has a higher ratio of consumption for learners. Whenever you need learners to consume information, that’s another way of saying it’s passive learning. In that case, you’ll likely want to opt for asynchronous learning. 

Individual work gives learners the freedom and flexibility to learn and digest new information at their own pace and revisit information to delve deeper as needed. This way of learning puts the responsibility on the individual to do the work, and depending on the work environment and availability of your learners, that’s definitely worth considering.

Developing a shared foundation

They say content is king but with asynchronous learning, curation is king. You can leverage asynchronous learning to build a shared foundation of knowledge with your group of learners. By assigning learners reading materials, training videos, and practice exercises, you can ensure everyone is building a common foundation of facts and information. This approach also allows learners to self-pace: they’ll spend less time on topics they grasp quickly and more time on topics that challenge them. 

Especially if you’re using it as pre-work for a larger curriculum, this approach is helpful in assessing your group’s knowledge to identify any gaps and actions needed. Asynchronous learning can provide valuable insights into the topics you should focus on as the curriculum progresses.

Minimizing the demand on the learner

Plain and simple: when you don’t need to be together as a group, don’t be. Asynchronous learning is a learner-centered method. When you have the opportunity to respect your learners’ time and autonomy, take it. 

Common pitfalls with asynchronous learning

Even if you understand the difference between synchronous and asynchronous learning, you still need to learn the pitfalls of each approach. When it comes to asynchronous learning, it’s impossible to ignore the issue of accountability. At the end of the day, you need your training to get done, and when you opt for real-time, scheduled learning, at least you know your learners will show up.

If you’re worried that an asynchronous approach means learning won’t happen, take a page (or six!) from Jeff Bezos’ approach at Amazon. The company famously employs six-page project briefs and schedules time for people to read them. Promote accountability by having your team members schedule time for asynchronous learning. Bonus: this practice reinforces that learning is a top priority for your organization. 

A way to think through synchronous vs asynchronous learning

So, is it really synchronous vs asynchronous learning? Sure, in some cases it is—but more often, it’s a choice we make again and again, as part of a larger strategy to bring about real behavior change in our learners. It’s worth considering how the two approaches can work together and complement your overall learning efforts. A blended learning strategy—a mix of synchronous and asynchronous efforts—can provide the best of both worlds. 

Whether you’re leveraging synchronous or asynchronous learning, one approach tends to inform the other. For example, the asynchronous pre-work you assign to learners can provide important data for how you’ll tailor your next live, synchronous session to deepen learning.

Here’s an example: You work for a restaurant group, and you need to train your bartenders how to make the new seasonal line of cocktails. You might start by giving your team the recipes and instructions in advance to learn and study (asynchronous learning). But in order to improve the quality of the drinks and get your bartenders comfortable with the new menu, you’d then hold a real-time training with the entire team to break into small groups and practice making drinks for each other (synchronous learning). The two styles can work together to create more successful outcomes overall.

Synchronous or asynchronous, the bottom line is that a one-size-fits-all approach just doesn’t cut it anymore. For learning professionals who believe in matching the right tool to the job, exploring synchronous and asynchronous learning is an exciting opportunity to meet learners where they are and create better learning experiences.

Are Learning Styles a Myth? Challenging Assumptions about How People Learn Best

What’s your learning style? Are you sure?

At one point or another, most of us have expressed our learning styles and learning preferences: maybe you consider yourself a visual learner; maybe you consistently get tripped up when listening to audio lectures. Either way, the concept of learning styles is deeply embedded in our culture—but in the learning space, it’s a highly debated topic.

So, what does the science really say about learning styles? How do we know if they even exist? And if there’s nothing to the learning styles myth, how should we think about learning instead?

What are learning styles?

The theory behind learning styles is that it’s beneficial to account for an individual’s preferred  learning styles when providing instruction or training. Neil Fleming popularized the theory in the 1990s, and he also developed the VARK questionnaire to help identify someone’s unique learning preferences.

In practice, learning professionals who subscribe to this theory aim to design lessons that will resonate with the different learning styles of individual learners: visual (seeing), aural (listening), reading/writing, and kinesthetic (hands-on learning). That could mean taking the same information and sharing it through pictures and diagrams for some learners (visual) and through a hands-on demonstration for others (kinesthetic).

People use all types of learning styles

It’s human nature to crave a deeper understanding of our behaviors and traits. It’s why self-analysis tools like Myers-Briggs, Enneagrams, and even astrology are increasingly popular. Different learning styles offer seemingly scientific insight and rationale for our behavior and even our strengths and weaknesses, but here’s the problem: there’s no empirical evidence that tailoring instruction to learning styles actually works. In fact, there’s way more evidence that catering to learning styles doesn’t work—and some in the learning community are so certain about the myth of  learning styles that they’re offering a $5,000 reward for any research that can prove the validity of learning styles.

So, are learning styles real? Are learning styles valid in any way? Despite how widespread the theory is, studies have shown time and again that people aren’t just one kind of learner. Luckily, there’s an upside to debunking the learning styles myth.

From learner to learner, we have more in common than we might think, and learning preference does not equal capacity. The latest research on learning styles shows that learning preferences aside, most everyone has a complete toolbox of ways to think. For example, even if you have a preference for watching a video, you probably still have the capacity to learn effectively through writing or reading. And in fact, the human brain is fairly predictable in how it responds to different tasks, engaging certain sensory areas of the brain—like visual, aural, or kinesthetic—for certain tasks, regardless of learning preference.

In other words, learning professionals can worry less about matching their content to the learning styles of individual learners and instead focus on identifying the right tool for the job.

How to build more effective learning experiences

While there’s no real harm in tailoring to the perceived preferences of learners, there can be a cost. When learning professionals invest too much time into identifying and accommodating individual learning preferences, they may be missing out on opportunities to create more effective learning experiences that are backed up by the science of how people learn. In that way, adhering to the learning styles myth could be doing some damage to your learning efforts.

With learning styles debunked, what are some new ways to approach your next learning project? We’ve spent years discovering what makes a powerful learning experience—here are a few ideas to help you design a learning experience that will resonate with all types of learners.

Aim for behavior change

There are so many different ways to transfer knowledge, and making the right choice can be overwhelming. Take a step back and consider the problem that needs to be solved. What behavior needs to change? Reliable and proven learning philosophies like the Kirkpatrick Evaluation Model can help you determine how you’ll evaluate the success of your learning project. Thinking about it through the lens of what behavior needs to change, and how learners will need to apply the behavior, will help you identify the best way to design your content.

Listen to the learner

While there’s no scientific imperative to accommodate learning styles, it’s still important to listen to learners and get to know your audience. Field research is a powerful tool for understanding the context of where your learners currently are: their prior knowledge, current challenges, and future goals. Understanding learner context will influence and inform the right fit for your audience.

Replication of the learning context

There are specific questions you should be able to answer before you start designing your learning project. For example, it’s important to consider context: how can you get the learner as close as possible to the real-world context in which they’ll  be applying the behaviors? How can they practice the behaviors they’re learning in realistic ways? Think scenario-based simulations, role play, and experiential learning. The closer you get to the actual context, the easier the transition from learning experience to real-world application will be.

Debunking the learning styles myth

Although the theory of learning styles isn’t backed up by science, the truth is much better: people benefit from all types of learning, which opens up countless opportunities to create learning experiences that truly empower learners.

Best Practices for a Smooth Software Transition

You did it! You’ve selected your learning or business software and are ready for implementation. But before you race ahead, consider the yellow flag. Taking things slow and watching out for potential potholes can make a big difference when it comes to an effective transition. 

Aside from maybe Leslie Knope (for you Parks and Rec fans), nobody is giddy about the work it entails to bring about successful change. Change is good, but it can also be overwhelming. So how do you make that software transition less stressful for your learners and your organization? With these best practices used in Maestro’s migration to a new Project Management (PM) software!

Plan to have a clear game plan

Cover as many bases as possible with a well thought out, documented plan. Your plan could include things like the technical aspects of your implementation, how/when your existing software will be discontinued, what training for end users might look like, and risks to watch out for at specific events or timelines. Be sure to include individuals from every team in your organization somewhere during planning to represent all key workflows and use cases. (This collective participation will nurture greater buy-in, too.) 

Keep your team in the loop

Poor communication regarding the ins and outs of your software implementation can leave your learners or end users feeling left in the dark. Let everyone know well in advance that change is on the horizon. Then remind them, and then remind them that you reminded them already. It’s natural to fear the unknown, so remove some of the surprise by giving your team frequent, small updates on timing and expectations. 

At Maestro, we relayed information about our PM transition early and often via Slack, lunch and learns, and team meetings. 

Enlist cheerleaders

Leverage the excitement of some of your company’s key stakeholders, whether they’re managers, early adopters, the “cool kids,” or all three. Find people who are already familiar and comfortable with the software, and encourage them to be advocates and help drive organizational change. 

Remember the people from your pilot team or others who may have spent significant time evaluating the software? Their casual praise of the solution and its new features can be way more meaningful to those who may be wary than a blurb in your corporate newsletter. Ask them to share their experiences of learning the new software and to provide assistance to employees who may be struggling. 

Let your data do the heavy lifting

All of that data you compiled during your selection and pilot/testing stages? (If you read our last post on our 8 step software evaluation process, you’ll recall our appreciation for spreadsheets and metrics.) Use the hard facts to your advantage. Fancy new UI is great, but what day-to-day business challenges will this tool solve? How much time will be saved? What meetings can be cancelled? When you interviewed your learners about the old learning software, what did they say? 

Leave room for error and buffer your timeline accordingly 

Even if you’re super confident in your decision, even if the software you chose is destined to be the next workflow superhero, problems can (and probably will) arise. Leave plenty of breathing room in your timeline for issues to pop up and be resolved to avoid overtaxing your implementation team. To work out any kinks or bugs, you should plan to allot three to five months. 

Having legacy access to your old software for a designated time period is a good insurance policy, too. 

Hold training or learning events 

Designating some time for a little extra training and championing of the software never hurts. The team at Wrike (our PM software provider) provided Maestro with an overview and wayfinding session. Next, we facilitated our own role-specific training that contextualized Wrike’s overview for people’s specific jobs and use cases. 

Additional training provides the opportunity to inspire dialogue and answer questions, underscore the new software’s benefits, and demonstrate its practical applications. With or without formal training events, look for creative ways to include your new learning software in your routine as often as it makes sense. 

Monitor and nudge engagement 

Congratulations, you’re up and running! But who is actually using the new software? It’s likely you’ll have individuals who dive right in, folks who lag far behind on land, and people who cautiously wade into the shallow end. Either way, It’s important to track their usage and engagement. To shift behaviors and nudge slower adopters to log in, build some daily functions or tasks into your platform. 

Hold open office hours for peace of mind

When you had a big paper or test looming, having a few moments to chat with that college prof one on one during office hours was a lifesaver (or at least a saver for your GPA). Asking for clarification or expressing a concern one on one can feel less intimidating, you can get really specific with your question, and talking “live” can also just plain be more productive. 

That’s why we held Zoom office hours for a few weeks after the official launch of our software. Team members could simply drop in and out with any questions they had as they began using and dissecting the new tool. 

Cross the finish line with a winning rollout 

Whether your new software is designed for learning, project management, or almost any workplace function, the transition won’t be free of hiccups. While it can be difficult to estimate how much stress your team will feel during this process, planning and guiding them along the journey—plus practicing a little (or a lot of) patience—can ease their minds and lead to a winning rollout. 

The Neurobiology of Why Your Learner’s Brain Responds to Great Storytelling

There’s something about stories that captivate us. Storytelling is what makes us human, and it’s a powerful force in shaping our knowledge, beliefs, and motivations. When you think about the power of storytelling, your first thought might be of the movies—even as Hollywood continues to churn out stories that follow familiar arcs we’ve seen time and again, we keep showing up and finding ourselves drawn in, happily paying to see it play out in different forms on the big screen. Why? Do we not recognize it’s the same plot we’ve seen before? It doesn’t matter: our brains are wired for stories, and it’s in our nature to look to stories in order to build trust, empathy, and make sense of the world around us.

So, we know that everybody loves a good story—but what role does storytelling play in creating powerful learning experiences? And how can learning professionals leverage the neurobiology of storytelling to empower and inspire learners? 

The neurobiology of storytelling isn’t as complicated as you might think: it all comes down to the neurochemicals our brain produces, specifically cortisol, oxytocin, and dopamine. You’ve probably heard these terms before, and you definitely don’t need to be a neurobiologist to begin to understand the science of storytelling and start putting it into practice in your learning experiences.

Cortisol: the attention grabber

We’ll start with cortisol, the hormone released in response to stress, which is what causes our fight or flight reaction when we’re scared. But there’s nothing scary about the role of cortisol in storytelling. Here, cortisol is in response to the action of a story—the danger, risk, or potential reward that the characters are facing triggers the release of cortisol in our brains.

You know that feeling when you pick up a novel and the plot immediately pulls you in, compelling you to keep reading? When your palms sweat during your favorite scene in a heist film? Or that moment during a football game when it’s the last minute, your team is down but can still win, and your heart is pounding? That’s cortisol. You were waiting for the excitement, and if it’s a well-told story—which the best sports games are—that’s exactly what you got. And now you’re hooked.

Without the reaction in our brains caused by cortisol, we lose interest quickly. We’ve all started a book, began a movie, or watched the first half of a game where nothing exciting really happens. The story loses us. We are human: we crave action, adventure, and a sense of risk, whether it’s real or perceived. In learning experiences, good storytelling grabs your learner’s attention and actually helps them focus, putting you in a better position for your content to connect and resonate with them. 

Oxytocin: identification with characters

Though cortisol may hook us into the story, it doesn’t keep us there. For that, we have to care and empathize with the characters. This is where oxytocin comes into play. In a story, oxytocin’s effects occur when we see ourselves in the characters—our own experiences in theirs, our own hopes, desires, and dreams in the plot. Think back to the last time you cried during a movie or while watching a television show. That was oxytocin having its effect on you, making you empathize with the characters you’re watching.

Where cortisol is the hook, oxytocin is what keeps us engaged in the story for the duration. Good storytelling transports us, and it can be a pretty magical experience. As Jeremy Adam Smith of the University of California, Berkeley Greater Good Science Center writes, “As the cortisol that feeds attention mixes with the oxytocin of care, we experience a phenomenon called ‘transportation.’ Transportation happens when attention and anxiety join with our empathy…For the duration of the story, our fates become intertwined with those of imaginary people.” 

Storytelling in learning experiences can do the same–when you bring empathetic, character-driven stories into your learning, your content is much more likely to resonate with your audience and inspire a lasting change in their behaviors and beliefs.

Related

How to Make eLearning More Effective with Storytelling

Dopamine: the desire for a happy ending

Now that we’re excited about the story and invested in its characters, we naturally seek a desirable resolution that leaves us feeling good. This feel-good emotion—and our desire for it—is the result of, among other neurochemicals, dopamine. We know that oxytocin causes us to identify with the characters, binding us to them. When we identify with characters that experience a positive resolution in the story, this leaves us satisfied and rewarded, almost as if we’re experiencing a happy ending ourselves.

But not all stories have a happy ending, and this causes the opposite effect. A less-than-desirable ending is often teaching us a lesson on what we don’t want to happen, and this motivates us to change our thoughts or behaviors accordingly to seek a better outcome. Our response to dopamine is what drives many of our behaviors and actions as humans, and for learning professionals hoping to inspire behavior change in their learners, that’s a powerful tool. Even if it means learning by failure, using storytelling as a learning framework makes your lessons that much more likely to translate to real-world outcomes.

Putting it all together

As humans, stories affect our whole lives. Our knowledge, perspectives, and even our survival have been—and continue to be—shaped by narratives. The psychological response to the three neurochemicals—cortisol, oxytocin, and dopamine—that govern great storytelling also influence how we learn, what we believe, what actions we take, and how we interact with others. 

As learning professionals, we are also inherently storytellers. The more we master the art of storytelling, the more effective our learning experiences will be. We want our audience to be hooked by the story, identify with the characters, and respond in a way that inspires real change. Stories are so much more than entertainment—they’re a vehicle to captivate the audience so we can teach them something about themselves, others, or our perspectives and experiences. 

By understanding and taking advantage of our natural human neurochemical responses to stories, we can craft learning experiences that impact our audience in a way that will stay with them and help them grow. 

The 8 Steps of Our Software Evaluation Process: How to Pick Your Next Learning Software

Whether it’s project management, accounting and billing, or learning, software is integral to the productivity of any worker and the success of any workplace. While software is often a genuine blessing in our professional and personal lives, when it’s time to make a change or dip your toes into a different technology pool, where do you begin? How do you navigate software evaluation without feeling stressed and overwhelmed by the sea of options?

When it comes to the available learning software choices out there, the sky really is the limit. But pause. Take a deep breath (or three). Because we’ve developed and tested an eight-step software evaluation process that will help you make the right choice for your company and your learners.

Looking for a little more zen while mulling that next upgrade or new solution? Keep reading! 

Let’s take software evaluation in strides 

Recently, we decided our project management (PM) software needed more than a minor tune up. The technology had matured a lot over the years and the functionality of our current software wasn’t very intuitive or meeting the needs of the team beyond our project managers. 

Because we believe in going the extra mile to understand what resonates with our end users, we started our evaluation journey at a critical launching point: discovery

Step 1: Discover what your learners (aka end users) need 

First and foremost, be sure to pick the brains of your users—i.e., your learners—so you can understand what they truly need out of the software experience. After all, when your users feel included and involved in the decision-making, they’re more likely to embrace your final decision, no matter where that ultimately lands. (Groans aside, teamwork really does make the dream work.)  

During this step, you should come away with an answer to this key question: What are the biggest user pain points or challenges you’re hoping this new software will solve?

Step 2: Pinpoint your must-haves

Translate the problems and needs you uncovered in the discovery phase into tangible requirements. Ask yourself, what does your LMS or LXP have to do to solve those problems or address learner needs? For our PM software evaluation, we developed a comprehensive spreadsheet that included: 

  • Giving each of our requirements a brief description that explained what we wanted the software to do. (Feel free to also note if and where there’s any flexibility in your particular requirements.)
  • Recording whether requirements were really must-haves or simply “nice-to-haves.” 
  • Weighting every requirement between one and five (five equals showstopper and one equals skippable). 

Step 3: Curate your list of possibilities 

To build that list, see what other people have said and think about the options by consulting online business software review platforms like G2 Crowd and Capterra. If your budget permits and there’s one available for the software you seek, you could also check into Gartner Magic Quadrant

And believe it or not, you can and should go ahead and Google it. 

As simple as it sounds, a Google search can give you valuable insight into what software solutions are out there, as well as what technology may be up and coming. 

Step 4: Go window shopping 

Window shopping is a great way to soak up information about a lot more than what’s trending in men’s or women’s wear. As we mentioned earlier, your list might become pretty epic, so window shopping websites is the first step toward culling it down. Feel free to linger at your own pace, but don’t feel pressured to take more than 10 to 15 minutes to complete this step. Here are some additional tips: 

  • In our opinion, a software product’s website often looks as good or even better than the actual software. If the website doesn’t feel intuitive or look very impressive, the product probably isn’t going to deliver what you’d like it to either. 
  • Check out the software product’s features while you peruse their website. A couple of questions and points to consider:
  1. At a glance, do the features generally meet your needs?
  2. You can get a good sense of a product’s target and point of view by examining the software feature they’re highlighting. Does that feature feel like it meets your macro-level needs?
  • If the company has made their roadmap or release notes public, this will provide insight into the features they’re working to improve or will soon debut, and where their software is headed in the future. 
  • During window shopping, aim to shorten your list by 50%. 

Step 5: Take the software on a trial run 

Take the software out for a spin—and yes, choose the scenic route. After all, if you don’t make time to try it, you’ll never really know if it’s going to get the job done for you. Sign up for a free trial or reach out to a sales rep to receive a demo and trial account. In our trial phase, we spent two to four hours with each product to judge if it checked the box for our five most important must-haves. In trialing, you should trim your list by an additional 25-50%. 

Step 6: Designate your testers (and put them to the test)

Now that you’ve narrowed down your options, it’s time to truly swim in them. Recruit a small group (six or seven people) to get up close and personal with your top software contenders. This test period will ultimately determine whether the product performs and streamlines your workflow. 

There are a variety of ways you can put your test group to the test. We created a prototype stage where we gave a cross-functional team of individuals a scoring guide (rubric of use cases) for rating each product. To aid in the scoring process, we also provided the team with several prompts. (You might want to designate a test group leader who can take an even deeper dive, too.)

Combined with providing their overall perspective on what the PM software did and didn’t do well, Maestro’s test group scored each tool on a scale of 1 to 5 in each use case. For our prototype stage, we utilized weighted scoring. (The nitty-gritty: Test group participants scored each requirement between 1 and 5, with 1 equaling not important and 5 equaling most important. Then participants would also use the same scoring system to rate how well each tool within the software implemented the given requirements. That rating would be multiplied by the weight to achieve a final score.)

Once your group has “run the software gauntlet,” sum up the scores to determine a final number for each platform. 

Related

How to Use Trello for Project Management—Plus Our Best Tips and Tricks

Step 7: When it’s close to liftoff, schedule a pilot period 

At this point, you should have two (or maybe three) possibilities to pilot. A short pilot period gives you the opportunity to run a real-world situation through the software. 

  • For your pilot, you could run a workflow, project, or in the case of learning, a corporate training module. 
  • Make sure you’re engaging the individuals who will actively use the tool on a day-to-day basis. Remember, their level of engagement will affect their confidence and buy-in on the decided winner. In person or via Zoom, go through your task or process in “simulated time,” speeding up the normal workflow so all steps can be completed in an hour or two. 
  • Depending on your aspirations, business criticality of the software, and/or budget, you could opt to pay for one or two pilots through your top vendors. Then select a few members from your test group to see how the software performs over a short time period (e.g., three months). 
  • Structure your pilots so they capture constructive quantitative and qualitative feedback from all of your players. Again, provide this group with a rubric for scoring specific functions and features, and to gather their broader impressions and thoughts in live discussion, interview style. 

Step 8: Reach your verdict—and the winner is?

If you’ve found a clear winner, congratulations! Your software evaluation work is done (when it comes to software selection anyway). If you haven’t reached a verdict, fear not. Gather and review all of the quantitative data you collected through your rubrics and score sheets to see if there’s an obvious favorite. 

Still unsure? Talk to your test group and anyone else you asked to participate in your evaluation process. Have these MVPs rank your remaining options. Try to investigate beyond the average rank. This is where weighted scoring can be especially valuable in driving the conversation. (For example, sometimes a single person’s not-so-rosy ranking can drag down the overall average, so seeing that a tool was in the 1 or 2 spot on all ballots but one can provide greater perspective.)

Last but definitely not least, listen to your gut. There’s a reason people tell you to rely on it for more than hunger cues. 

What Is Synchronous Learning? Plus the Pros and Cons

There’s synchronized swimming. There’s marching bands. There’s even human lcd boards. But what about synchronized learning?

Coordinating various moving pieces (or people) to reach a universal goal or accomplish a task is no easy feat. It often takes planning, practice, and dedication to successfully pull it off. And these choreographed pursuits are definitely a sight to see! But is synchronous learning as complicated or difficult as these other synchronized activities seem to be? Let’s break it down. 

What is synchronous learning?

The definition of “synchronous” is to exist or occur at the same time. It might remind you of phrases like “let’s synchronize our watches” or “let’s sync up.” But what exactly does synchronous learning mean? You’re probably more familiar with it than you realize. Synchronous learning is simply when people are learning the same thing at the same time. Synchronous learning is typically associated with the traditional classroom model: students in a classroom with a teacher. In this setting, knowledge transfer happens in real time. And for a long time, this was how learners were taught! But as technology has expanded, options for synchronized learning have broadened. Virtual synchronous learning, sometimes called “distance learning,” runs like a traditional classroom where an educator presents or teaches and learners listen and participate online. 

Examples of synchronous learning

The primary example of synchronous learning is the standard classroom where an instructor transfers knowledge to learners. But this isn’t the only example of synchronous learning. With the recent increase in virtual options, there are many digital versions of synchronous learning too. Some examples include interactive webinars, virtual conferences, and live-streamed lectures or presentations. Basically, the key indicator that an example is synchronous learning is that the learning is happening at the same time. This is the opposite of asynchronous learning, another popular virtual learning format, in which learners do not need to participate at the same time. 

Related

What Is Asynchronous Learning? Plus the Pros and Cons

Advantages and challenges of synchronous learning

Pros of synchronous learning

Live interaction

Not only does live interaction help keep learners engaged, but it also allows the instructor to adjust to learners’ needs in real time. The educator can actively drive discussion and engagement based on the ebb and flow of the conversation, and they also have the ability to further explain material that learners are having trouble with or otherwise adapt the lesson to better suit learners’ needs. However, not all synchronous learning formats allow for flexibility in the same way or to the same degree. For example, live-streamed lectures have a lot less adaptability than a virtual classroom discussion. Additionally, the ratio of instructors to students also impacts the quality of the live interaction. 

Short feedback timeline

Another advantage with synchronous learning is a short (often instantaneous) feedback loop. Because students can interact in real time with their instructor, questions can be answered and feedback can be given immediately. 

Familiarity

Synchronous learning, whether learners recognize the term or not, is familiar. The traditional classroom environment is what most learners are used to and have experience with (at least for now), so they may be more comfortable with this format. Additionally, the synchronized schedule provides structure, which can be helpful for learners who aren’t individually motivated or well organized. 

Synchronous learning definitely has its advantages, but what about the challenges of using this format?

Cons of synchronous learning

Inflexible

In the synchronous format, educators and learners have to be on the same schedule, and that can be challenging. This inflexibility can also create a barrier if a learner really wants to participate in a learning opportunity but is unable to because of scheduling conflicts. This is true of both in-person and virtual synchronous learning. Though virtual synchronous learning allows flexibility in where the learner is participating, it remains inflexible in when the learner is participating. 

Uniform learning pace

Additionally, the learning pace is set by someone other than the learner and that pace is the same for all learners. In an asynchronous learning format, individual learners have a lot more control over their learning experience. They can choose when they engage with the material and how much time they spend on different segments (within parameters). With synchronous learning, however, learners are expected to engage during specific, set times and to move from topic to topic at a set speed. 

Passive

Despite the real time interaction, synchronous learning lessons can fall into the trap of instructor lectures, learners listen, class over. Basically, it can become a passive experience for learners if educators don’t incorporate interactive components. That being said, synchronous learning has the potential to be a more exciting, engaging option for learners than some other options, but the potential for passivity is something educators should be mindful of. 

Like anything else, synchronous learning isn’t perfect, but that doesn’t mean it isn’t worth using! 

Incorporating synchronous learning in your lessons

Because synchronous learning is often the standard classroom model, you may already be using it. And there’s a lot to like about it! For the reasons above (and more), synchronous learning can be a great option for in-person or virtual learning, especially if you are interested in real time, live interaction. However, it’s worth keeping in mind the potential weaknesses of synchronous learning. If you’re looking for an option that allows learners to choose their schedule and pace, asynchronous learning might be a better fit. But no matter what option you choose, remember to consider the needs of your learners to create the best possible experience. And when in doubt, contact Maestro! We’re here to help. 

Gamify Employee Career Growth Using WordPress

CSL delivers innovative biotherapies and influenza vaccines that save lives as well as enable people with life-threatening medical conditions to live full lives. Driven to make a meaningful difference for hundreds of thousands of patients and stakeholders around the world, this dynamic company strives to continually motivate its workforce to think outside the box.

To inspire these brilliant minds to expand their skill sets and grow their careers, Maestro designed a thoughtful eLearning solution with a unique gamified approach outside of the authoring tool.

A whole new game for inspiring career growth

The intention of the learning experience was to encourage employees to explore options for their long-term career path at CSL, based on their perceived strengths, skill sets, and goals. And while games are typically whimsical and entertaining by nature, they’re also often more complex to build than most players might realize. The following were our “rules,” if you will, for building an interactive career pathways game for CSL:

  • Design an engaging and fun solution for a global, virtual audience (27,000 employees spanning the globe).
  • Motivate new hires and seasoned team members to visualize their future with CSL.
  • Connect the overall messaging/approach to corporate strategy initiatives.
  • Create a personalized learning journey that functions and lives well on multiple devices.
  • Ensure a one-player, asynchronous environment.
  • Collect key user data.
  • Limit play time to 10—15 minutes.
Related

Think outside of the Authoring Tool, with a Custom Software Simulation

Winning with WordPress 

The first step was to identify the best platform to support our project needs. Considering the scope and expedited project timeline, we determined WordPress to be an optimal content management system for this custom gaming experience. Along with its cost effectiveness, especially when compared to Articulate Storyline or custom software, WordPress also offered design, implementation, and device flexibility and allowed for the collection of key analytics.

How we did it    

At the beginning of the project, we mapped the pathways and decisions a player could make as they traveled through their career life cycle. This required really thorough exploration of roles and close collaboration with the CSL team.

Here’s a peek at what mapping the options looked like.

A simplified look at the CSL logic tree paths we needed to map before jumping in.

Once we nailed down the paths and events along their journey, we designed characters, events, and player interactions. The final result: an inviting visual style, an experience that’s intuitive on multiple devices, and an interaction that’s inspiring and casts a positive vision for employee growth.

Maestro developed the experience all outside of an authoring tool and on a platform that most people think is only for blogging or websites. We like to think of the experience as a learning game-changer.

Two smartphones displaying the CSL course "Choose Your Own Promising FUTURES Adventure"

Key takeaways

Want to go beyond your (authoring-tool) comfort zone? Here are some questions to consider before you start:

  1. Does the authoring tool put too many constraints on your vision?
  2. Do you want your final product to tell a story and be narrative driven?
  3. Do you want your learning to function like a dream, on multiple devices?
  4. Have you thoroughly mapped out your process? (Going outside of an authoring tool can be an ideal solution for complex process training or learning with multiple variables.)
  5. Do you have a development partner who’s not only an expert in the learning field but also skilled in creative/interactive design?